How To Draw Lips In 5 Easy Steps – Quick and Simple
Posted on |
Introduction to Drawing Lips
Lips add character, emotion, and individuality to portraits, making them a rewarding subject for artists. Mastering lip drawing requires both precision and subtlety, as their curves and textures are complex. Learning to render lips accurately elevates any portrait, bringing it to life through nuanced detailing.
Materials Needed for Lip Drawing
Start with the right tools. For sketching and shading, use graphite pencils ranging from HB to 6B. Smooth or bristol paper works well to enhance shading transitions, while blending tools like tortillons or soft tissue add softness. Optional materials, like kneaded erasers, allow for refined adjustments to highlights.
Understanding Lip Anatomy for Realistic Drawing
Realistic lips start with understanding their structure. Lips consist of two main parts: the fuller, curved upper lip and the more voluminous lower lip. The subtle peaks, like the Cupid’s bow, give lips their distinct shape. Recognizing these details helps achieve natural proportions and fluidity.
Step 1: Sketching the Basic Shape
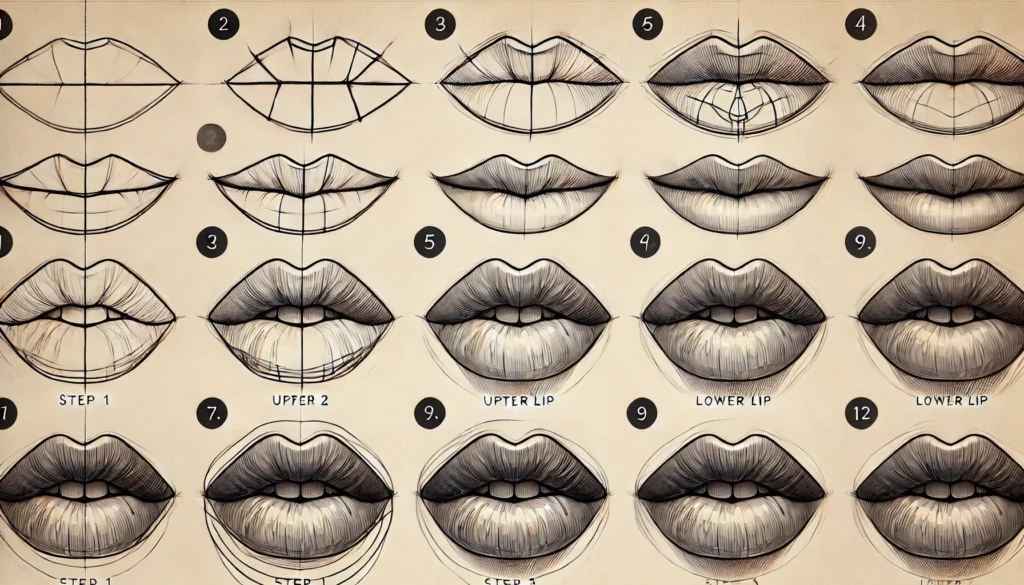
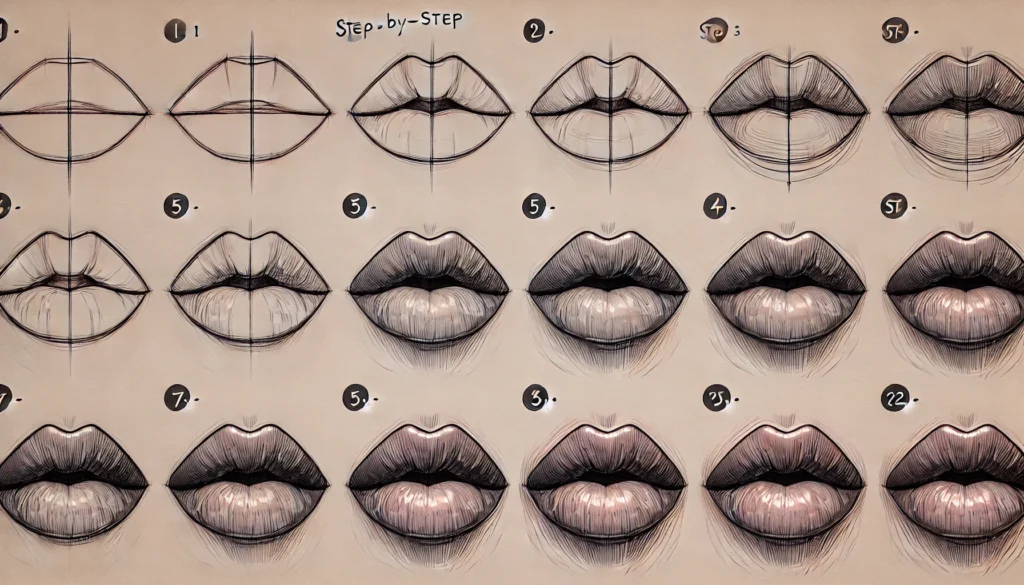
Begin with a light sketch. Draw a rough outline of both lips, keeping the shape slightly curved to match their natural form. The upper lip typically forms a gentle M shape, while the lower lip follows a soft U shape. Establishing these shapes provides a reliable foundation for more detailed work.
Step 2: Adding Structure and Symmetry
For balanced lips, ensure symmetry by marking the centerline, especially helpful for capturing the Cupid’s bow. Observe the proportions carefully – the upper and lower lips vary in fullness. Using light strokes, define the top and bottom lips while maintaining overall harmony.
Step 3: Shaping the Contours
With the basic shape established, refine the lip contours. Pay close attention to the subtle undulations along the lip’s edges. Use curved lines to convey the natural flow of the lips, avoiding harsh or overly straight edges. These soft curves bring realism to your sketch.
Step 4: Applying Shading for Depth
Shading adds depth and makes lips appear three-dimensional. Use gradual shading from the edges inward, with darker tones near the corners and lighter ones at the center. This subtle gradient creates a plump appearance, bringing the lips forward in the drawing.
Step 5: Enhancing Details for Realism
Add texture by drawing faint lines to mimic natural creases. Refine the edges gently for a softer look, avoiding heavy outlines. Finally, enhance areas where light hits for realistic highlights, especially near the center of the lower lip. These finishing touches add lifelike depth and softness.

Tips for Perfecting Lip Highlights
Highlights create a glossy effect and make lips appear hydrated. Use a light hand or an eraser to gently lift color from areas catching the most light. Placing highlights strategically on the lower lip’s central curve enhances the natural gloss and roundness of the lips.
Common Mistakes in Lip Drawing and How to Fix Them
Avoid harsh outlines, as they create an unnatural look. Instead, blend the edges softly into the surrounding skin. Also, watch for symmetry – lips often appear slightly different on each side, so embrace subtle imperfections to enhance realism.
Exploring Different Lip Shapes
Lips come in various shapes. Experiment with drawing thin, narrow lips or full, plump lips to capture diversity. Each shape requires a distinct approach, from contour adjustments to shading intensity, helping your sketches feel unique and personalized.
Techniques for Drawing Different Expressions
Expressions change the lips’ shape and tension. To draw smiling lips, note the corners lifting and subtle creases forming. For relaxed or neutral lips, focus on natural softness and slight parting. Expressions give life to your drawings, making them relatable.
Creating Texture: Making Lips Look Lifelike
Lifelike lips have texture, with fine lines and subtle creases. Use gentle, layered strokes to create these lines without over-emphasizing them. Blending the lines with a soft tool like a blending stump brings a polished finish, making the lips appear more natural.
Choosing the Right Shading Style
For soft, natural lips, use light, blended shading. For a bolder or dramatic look, add darker shading around the edges and define the center’s highlights. Shading style alters the mood, helping you capture either subtlety or intensity in your drawings.
Enhancing with Colored Pencils
Colored pencils allow for lifelike color layering. Begin with light base colors, gradually building richer tones. Use blending techniques to smooth out colors, achieving realistic skin tones and lip textures. Colors bring vibrancy and depth to your drawings.

Using References to Improve Accuracy
Photo references provide guidance on proportions, textures, and lighting. Observing real lips helps you capture subtleties and build a more accurate portrayal, essential for honing realistic drawing skills. References enhance your understanding of shape and detail.
Practicing Lip Drawing: Exercises for Improvement
Consistent practice develops skill and confidence. Start with simple sketches, then gradually add detail as you improve. Quick exercises, such as drawing lips from different angles, help build muscle memory, making each drawing more accurate and fluid.
Exploring Digital Tools for Lip Drawing
Digital drawing offers endless possibilities with brushes and textures. Use layering to add depth and adjust opacity for subtle shading. Digital tools enable quick corrections, enhancing your workflow while allowing for experimentation with different styles and colors.
Showcasing Your Lip Drawings
Share your progress on social media platforms or in a portfolio. Creating a collection of lip studies shows your growth as an artist and demonstrates versatility. Sharing your work encourages feedback, helping you refine your style and technique over time.
Final Thoughts on Mastering Lip Drawing
Drawing lips is a skill that grows with patience and practice. Each attempt brings you closer to mastering their complexity and beauty. Enjoy the journey of progress, knowing each stroke adds to your artistry and precision.

