How To Draw A Duck 5 Easy Steps – Quick and Simple
Posted on |
Introduction How To Draw A Duck
Drawing a duck may seem simple, yet the charm lies in capturing its unique shape and personality. Ducks are endearing subjects, fitting for both whimsical cartoons and realistic sketches. This guide provides a step-by-step approach that makes drawing a duck accessible and enjoyable for all ages. With just a few steps, you can turn a blank page into a lively, feathered friend.
Why Learning to Draw a Duck is Fun and Simple
The appeal of drawing a duck is universal. Ducks have a recognizable form and are forgiving in terms of detail, making them ideal for beginners. Whether you want a friendly cartoon duck or a more realistic portrayal, ducks allow for artistic exploration without complexity.
The Allure of Drawing Ducks: From Cartoons to Realistic Art
Ducks can be seen everywhere, from playful illustrations in children’s books to elegant waterfowl art in galleries. Drawing a duck offers versatility; it can be as stylized or realistic as you prefer. This variety keeps the process engaging and creatively rewarding.
Gathering Materials
Choosing the Right Paper and Pencil
Selecting a medium-weight paper and a standard pencil (HB or 2B) sets a solid foundation for your drawing. Paper with a slight texture helps hold pencil lines well and adds subtle depth to your strokes.
Optional Supplies to Enhance Your Duck Drawing
While a simple pencil will do, having colored pencils or markers on hand allows you to add life to your duck drawing. An eraser is also helpful for refining shapes, and a fine-tipped pen can add final line definitions.

Step 1: Sketching the Basic Shape
Starting with Simple Shapes: Circles and Ovals
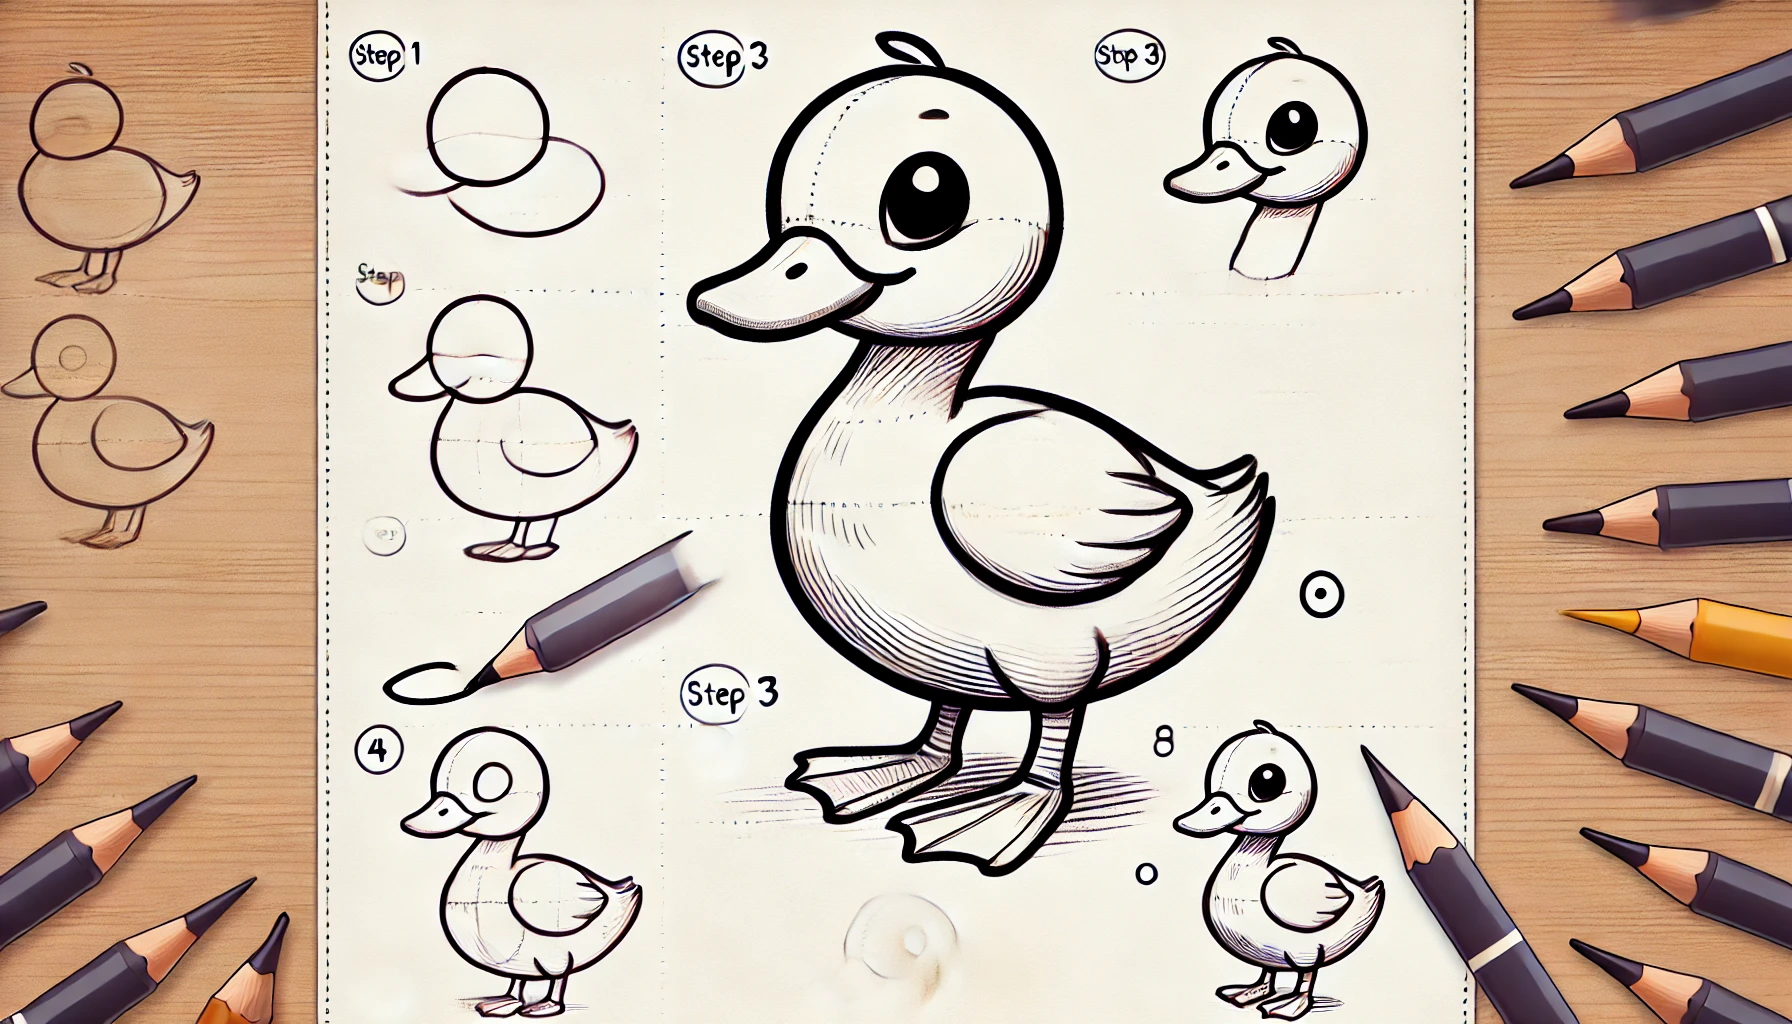
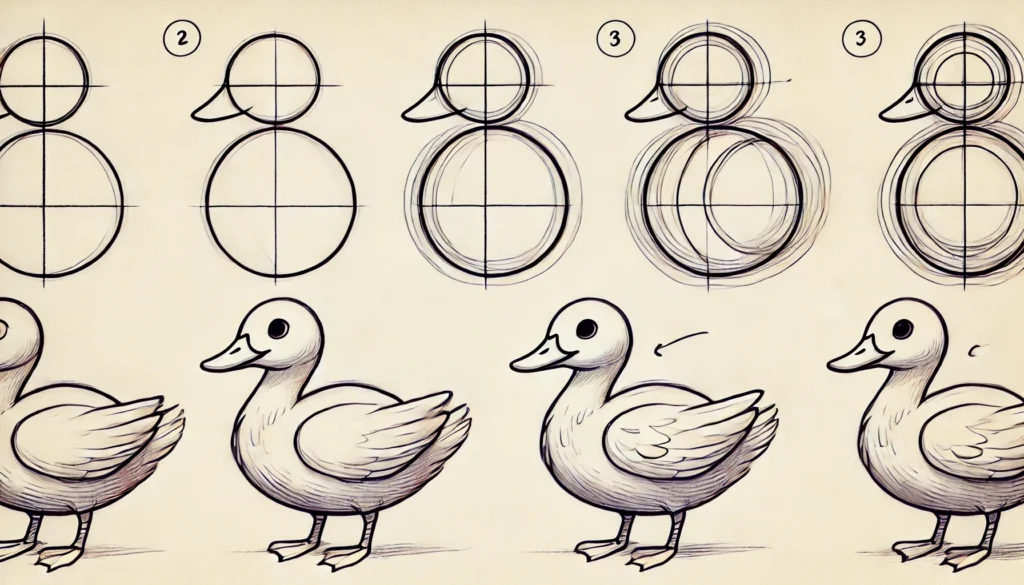
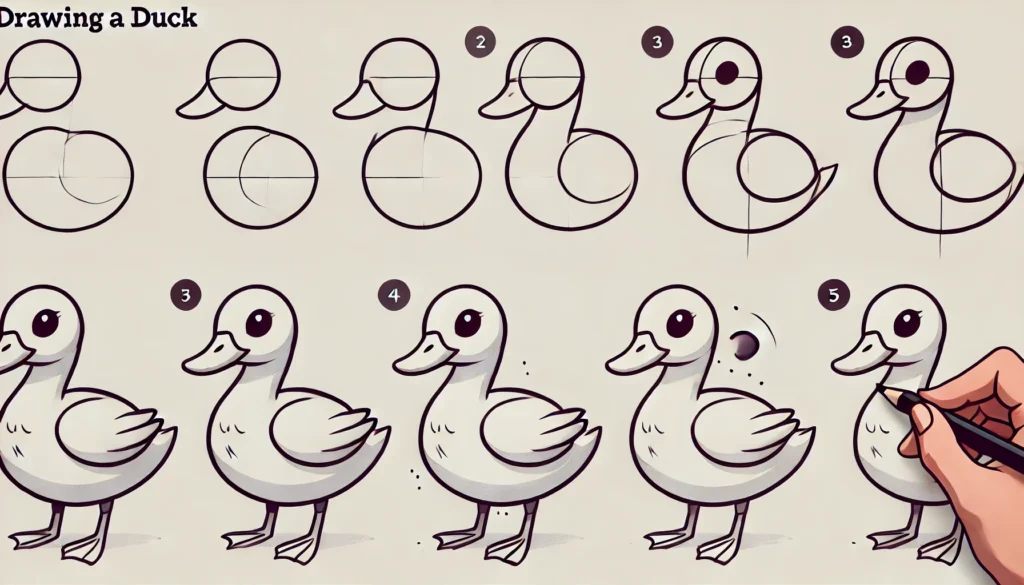
Begin by sketching an oval for the body and a circle for the head. These shapes serve as the duck’s core structure, guiding the proportions and placement of features.
Positioning the Head and Body for Proportion
Place the head circle slightly above and to the left of the body, aligning it naturally. This placement gives your duck an authentic posture and ensures a balanced look.
Step 2: Outlining the Body
Creating the Body’s Outline for Realistic Flow
Refine the oval shape, adding slight curves to make the duck’s body look softer. Avoid sharp edges; ducks have rounded, smooth forms that create a natural flow.
Shaping the Duck’s Round Body and Defining its Size
Think about the size and fullness of the duck. A smaller, round body suggests a baby duck, while a more elongated form suits an adult. This detail adds character to your drawing.
Step 3: Adding the Head and Beak
Drawing the Duck’s Head: Perfecting Size and Placement
Refine the head’s circle to add a bit of curvature, giving it a natural look. The head should feel proportionate to the body, neither too large nor too small.
Creating a Duck’s Beak: Capturing its Iconic Shape
The beak is a defining feature. Draw a small, rounded triangle at the front of the head circle, angling slightly downward. This shape brings a recognizable duck-like expression to life.
Step 4: Drawing the Wings and Tail
Adding Wings: Crafting Details for a Natural Look
The wings can be suggested with simple curves along the body’s sides. Adding a few lines to the wing shapes gives them a feathered appearance without overcomplicating the design.
Shaping the Tail for Realistic Balance
A duck’s tail is small and slightly pointed. Sketch the tail at the rear of the body, keeping it proportional. A subtle flick upwards adds a touch of playfulness.
Step 5: Finishing Touches – Eyes, Feet, and Feather Details
Drawing the Duck’s Eyes for Expressiveness
Place the eye just above the beak. A simple dot or small circle suffices, but you can add a tiny white dot within it for a glint that brings life to your duck’s expression.
Adding Webbed Feet for Final Realism
Draw two slightly curved lines extending from the bottom of the body for legs, adding small webbed feet at the ends. The webbing detail defines them as distinctly duck-like.
Feather Detailing to Add Depth and Texture
Lightly sketch small curves along the wings and tail to suggest feathers. These details create texture, making your duck look more polished and complete.
Finalizing Your Duck Drawing
Cleaning Up Pencil Lines and Adding Definition
Go over the key outlines with a slightly darker pencil or pen to enhance the structure. Erase unnecessary guidelines for a clean finish.
Optional Coloring Tips to Bring Your Duck to Life
Adding color enhances your drawing, whether you choose natural hues or whimsical shades. Light yellow with a hint of orange can give your duck a lively appearance.
Common Mistakes to Avoid
Proportional Pitfalls and How to Correct Them
One common error is drawing the head or beak too large. If this happens, gently adjust the size to keep the duck’s overall look harmonious.
Overly Complicated Details: Keeping it Simple
Ducks do not need excessive detail. Focus on simple shapes and clean lines, letting your duck’s essence shine through without distraction.
Practicing for Perfection
Repetition: How Practice Makes Ducks Easier
Practice enhances familiarity. Draw the same duck several times, tweaking and refining each one to build confidence and precision.
Experimenting with Different Duck Poses
Try drawing your duck in different positions – swimming, standing, or preening. This experimentation enriches your skills and adds diversity to your portfolio.
Exploring Duck Drawing Styles
Cartoon Ducks vs. Realistic Ducks: Choosing Your Style
Decide on a style that appeals to you. Cartoon ducks are more playful, while realistic ducks involve refined details and subtle shading.
Minimalist Ducks: Simplifying Shapes
Minimalism offers elegance. Draw a duck with only the essential shapes, capturing its form with a few precise lines.
Going Beyond the Basics
Adding Background Elements like Water or Grass
Consider sketching a pond or grass to place your duck in context. These background elements create a complete scene, enhancing your artwork.
Drawing a Duck Family: Variations in Duck Shapes
Adding smaller ducks can represent a duckling family. Smaller ovals and circles distinguish ducklings from adult ducks, adding a narrative layer.

Enhancing with Colors and Shading
Simple Coloring Techniques for Beginners
Soft coloring works well for beginners. Light strokes with colored pencils or crayons can make your duck vibrant without overwhelming detail.
Shading Tips to Make Your Duck Look Three-Dimensional
Shading around the duck’s belly and wings adds dimension. Soft pencil shading can create depth, giving the drawing a more lifelike feel.
Inspiration and Resources
Popular Duck Artists and Illustrations to Study
Study works by artists who specialize in wildlife illustration. Their techniques can inspire and guide your own duck drawings.
Online Tutorials and Practice Sheets
Numerous online resources offer step-by-step guides and practice sheets. These can aid you in refining your technique.
Wrapping Up: The Joy of Drawing Ducks
Celebrating Your Creation
Every completed drawing is a success. Take a moment to appreciate your finished duck – a product of creativity and practice.
Encouraging Further Artistic Exploration
Ducks are just the beginning. With each drawing, you grow as an artist, ready to tackle even more delightful creations.

