How To Draw A Bat 5 Easy Steps – Quick and Simple
Posted on |
Introduction How To Draw A Bat
Drawing a bat can be the perfect blend of simplicity and spookiness, fitting for any artist from beginners to seasoned sketchers. Simplicity in drawing isn’t just about basic shapes; it’s a way to capture essence without overwhelming detail. Bats, with their unique anatomy, provide an exciting challenge that is achievable when broken down into easy steps. Let’s start by understanding the essentials and gathering the tools needed: a basic pencil, eraser, and paper are all you need for this adventure into bat art.

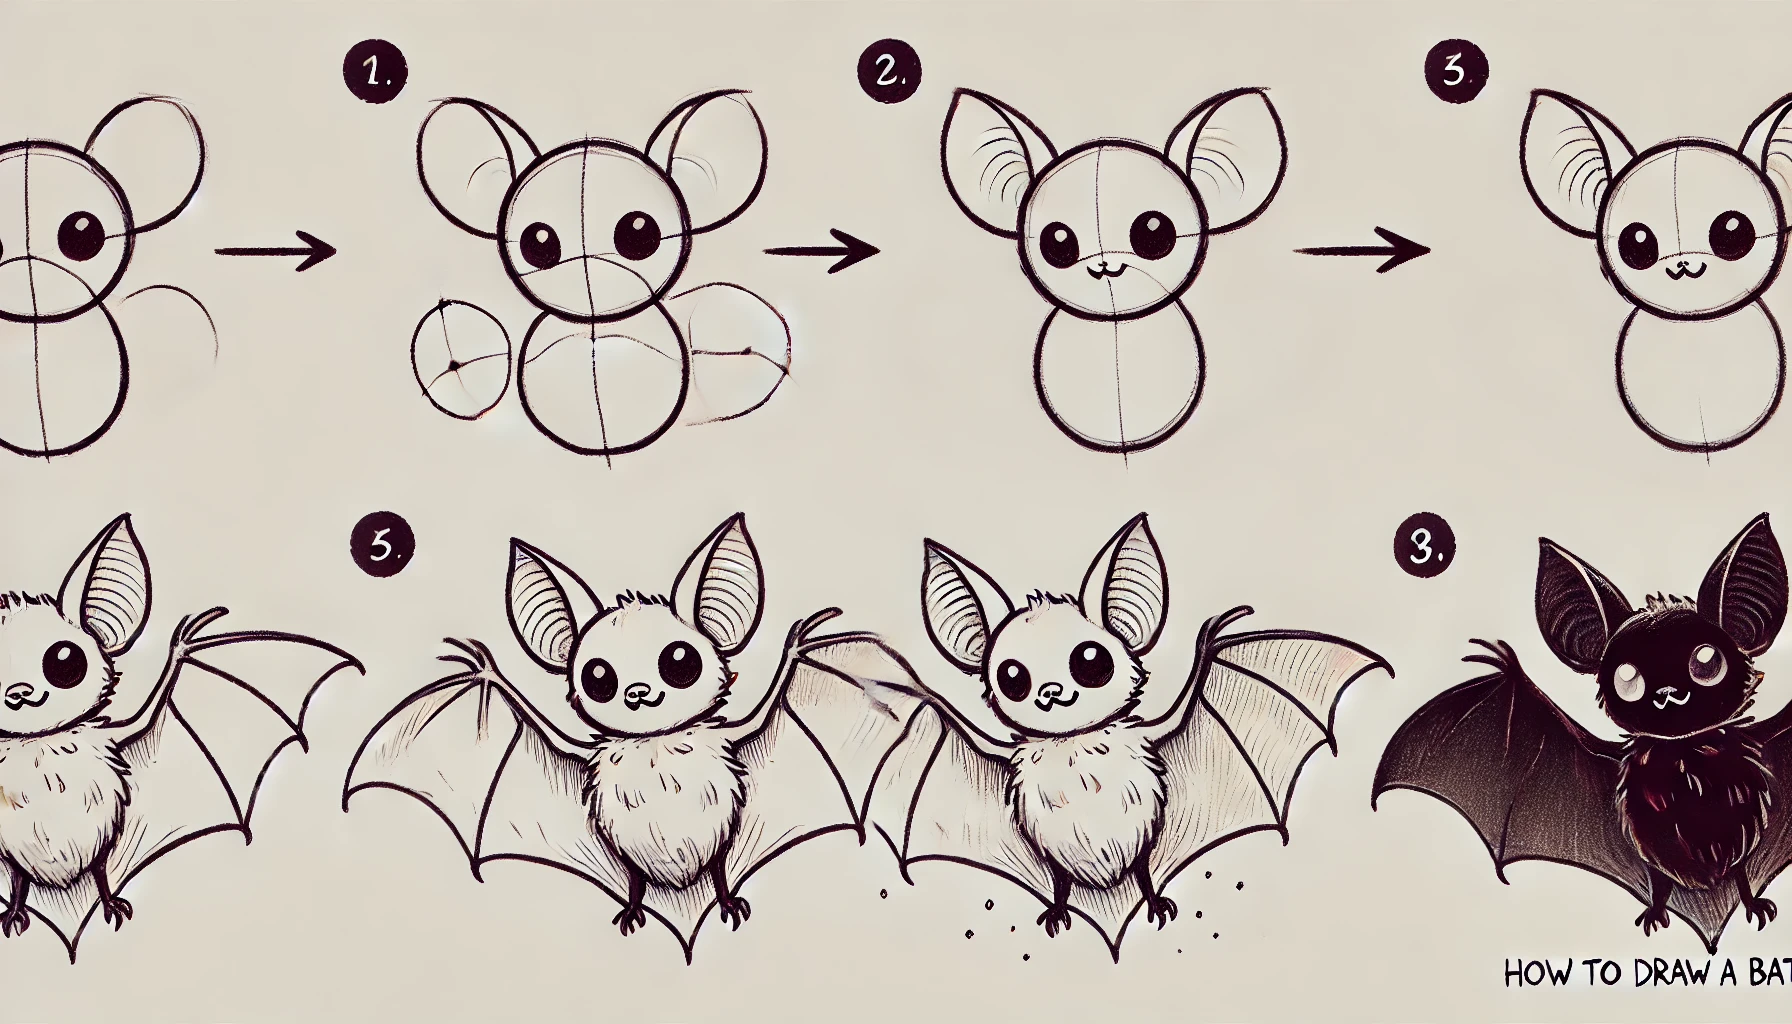
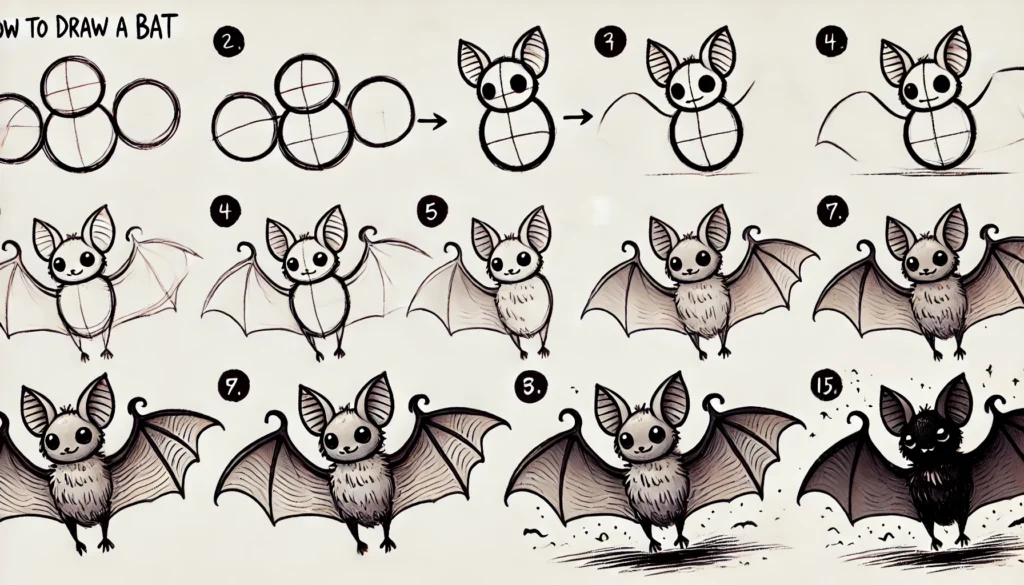
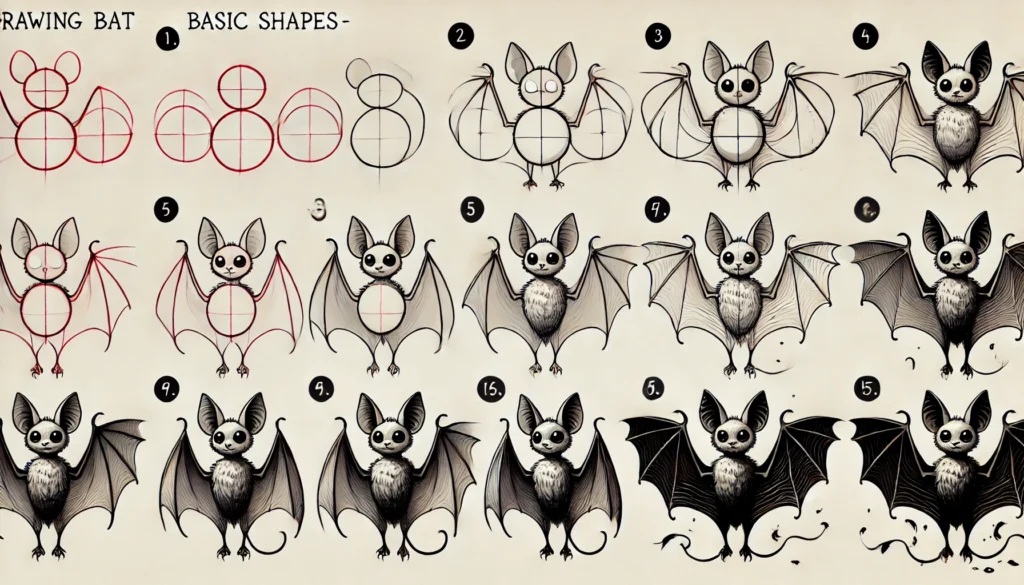
Step 1: Starting with Basic Shapes
Foundational shapes are the bedrock of any drawing. Start with a small circle for the head, adding two tiny triangles at the top for ears. These primary shapes help in achieving symmetry and proportion, allowing the bat’s form to emerge without guesswork. The torso can be depicted with an oval shape, giving the bat’s body a compact and recognizable form. Keep it simple here, as these shapes guide the entire sketch.
Step 2: Creating the Bat’s Wings
Bats’ wings are iconic, and understanding their anatomy is key. The wing starts from the bat’s shoulder, with delicate bones that fan outward. Sketch lines extending from the torso, slightly curved to resemble the natural spread of a bat’s wing bones. Then, connect these lines with long, gentle curves to mimic the stretched membrane between the bones. These sweeping lines give the wings a sense of motion and elegance, capturing the bat’s flight-ready posture.
Step 3: Crafting the Face
A bat’s face might be small, but it’s essential to get it right for character. Begin by placing small, round eyes and a tiny, inverted triangle for the nose, lending the bat an expressive look. Add a few small, sharp lines for teeth—just enough to hint at fangs without going overboard. To enhance realism, shade lightly around the eyes to create depth, making the eyes appear set in the face. The subtle shadowing adds personality and a hint of mystery.
Step 4: Defining the Body and Legs
With the basics in place, it’s time to add definition to the torso and legs. Bats have small but defined musculature, which you can suggest with slightly darker lines around the torso’s edge. For the legs, draw thin lines extending from the base of the body, finishing with tiny claws at the tips. These claws, though small, ground the bat in realism and add a fine detail that draws the eye. Texture on the body can also enhance the lifelike quality, creating a sense of fur or skin as desired.
Step 5: Finishing Touches
To complete your bat, darken the outlines of each shape, refining any light lines to a solid form. Add final details to the wing membrane, tracing light, feathered lines that suggest veins. This delicate touch gives the wings an authentic appearance, as if they’re ready to catch a gust of air. For an added effect, shade lightly below the bat to create a shadow. This grounding technique brings the drawing to life, adding a three-dimensional feel to the finished piece.
Tips for Achieving Realism in Bat Drawings
Realism often lies in the details. Shading plays a pivotal role here—focus on darkening specific areas, like around the eyes and wings, to add contrast. By keeping some parts lighter and others shadowed, the bat appears to have dimension. Small details, such as texture or subtle vein lines on the wings, add authenticity. Don’t be afraid to experiment; each stroke can add to the character of your bat.

Common Mistakes and How to Avoid Them
Mistakes are part of learning, but knowing what to avoid helps smooth the journey. Overcomplicating the wing structure, for example, can detract from the simplicity. Keep the lines of the wings smooth and light. Proportions matter—make sure the head, body, and wings are balanced. Lastly, shading shouldn’t be rushed; taking time to shade adds depth that elevates a sketch from good to striking.
How to Adapt This Bat Drawing for Different Styles
One drawing can inspire many styles. To make it cartoonish, exaggerate features like the eyes or fangs, giving the bat a friendly or mischievous look. For a realistic style, use intricate shading and detailed textures. If fantasy calls to you, consider altering wing shapes or adding unique patterns to create an otherworldly creature. Each style brings a fresh perspective to the bat, allowing endless creative possibilities.
Using Your Bat Drawing in Art Projects
This bat sketch can shine beyond the sketchbook. Place it within a Halloween scene, adding pumpkins or spooky trees for a festive touch. You might use it on stationery, creating personalized notecards or party invitations. Transform it into wall art by adding a colored background or framing it. With just five simple steps, your bat drawing can become part of a larger artistic vision, making it a versatile piece that adapts to your creative needs.

