How To Draw A Crown 5 Easy Steps – Quick and Simple
Posted on |
Introduction How To Draw A Crown
Crowns have captivated artists for centuries. Their timeless allure and inherent symbolism of power make them a fascinating subject. Drawing a crown isn’t just about creating an object—it’s about capturing an aura of elegance, mystery, and prestige. From the sharp arches to the gleaming gemstones, a crown can transform even the simplest drawing into a masterpiece.
Step 1: Gather Your Drawing Tools
For a straightforward crown sketch, only a few tools are essential:
- Basic Tools: A pencil, eraser, and sturdy paper will do the trick. Using a mechanical pencil can help maintain consistent lines, while a soft eraser keeps your sketch clean.
- Optional Tools: Add flair with colored pencils or markers to bring your crown to life. For shading, a fine-tip pen or graphite pencils in varying softness levels can add subtle dimension.

Step 2: Understand the Structure of a Crown
Before pencil meets paper, visualize the crown. Most crowns follow a similar structure: a base band and rising points or arches. Study references of real crowns—note the shapes and symmetry. Every crown has a unique form, from simple circlets to elaborate, gemstone-studded designs.
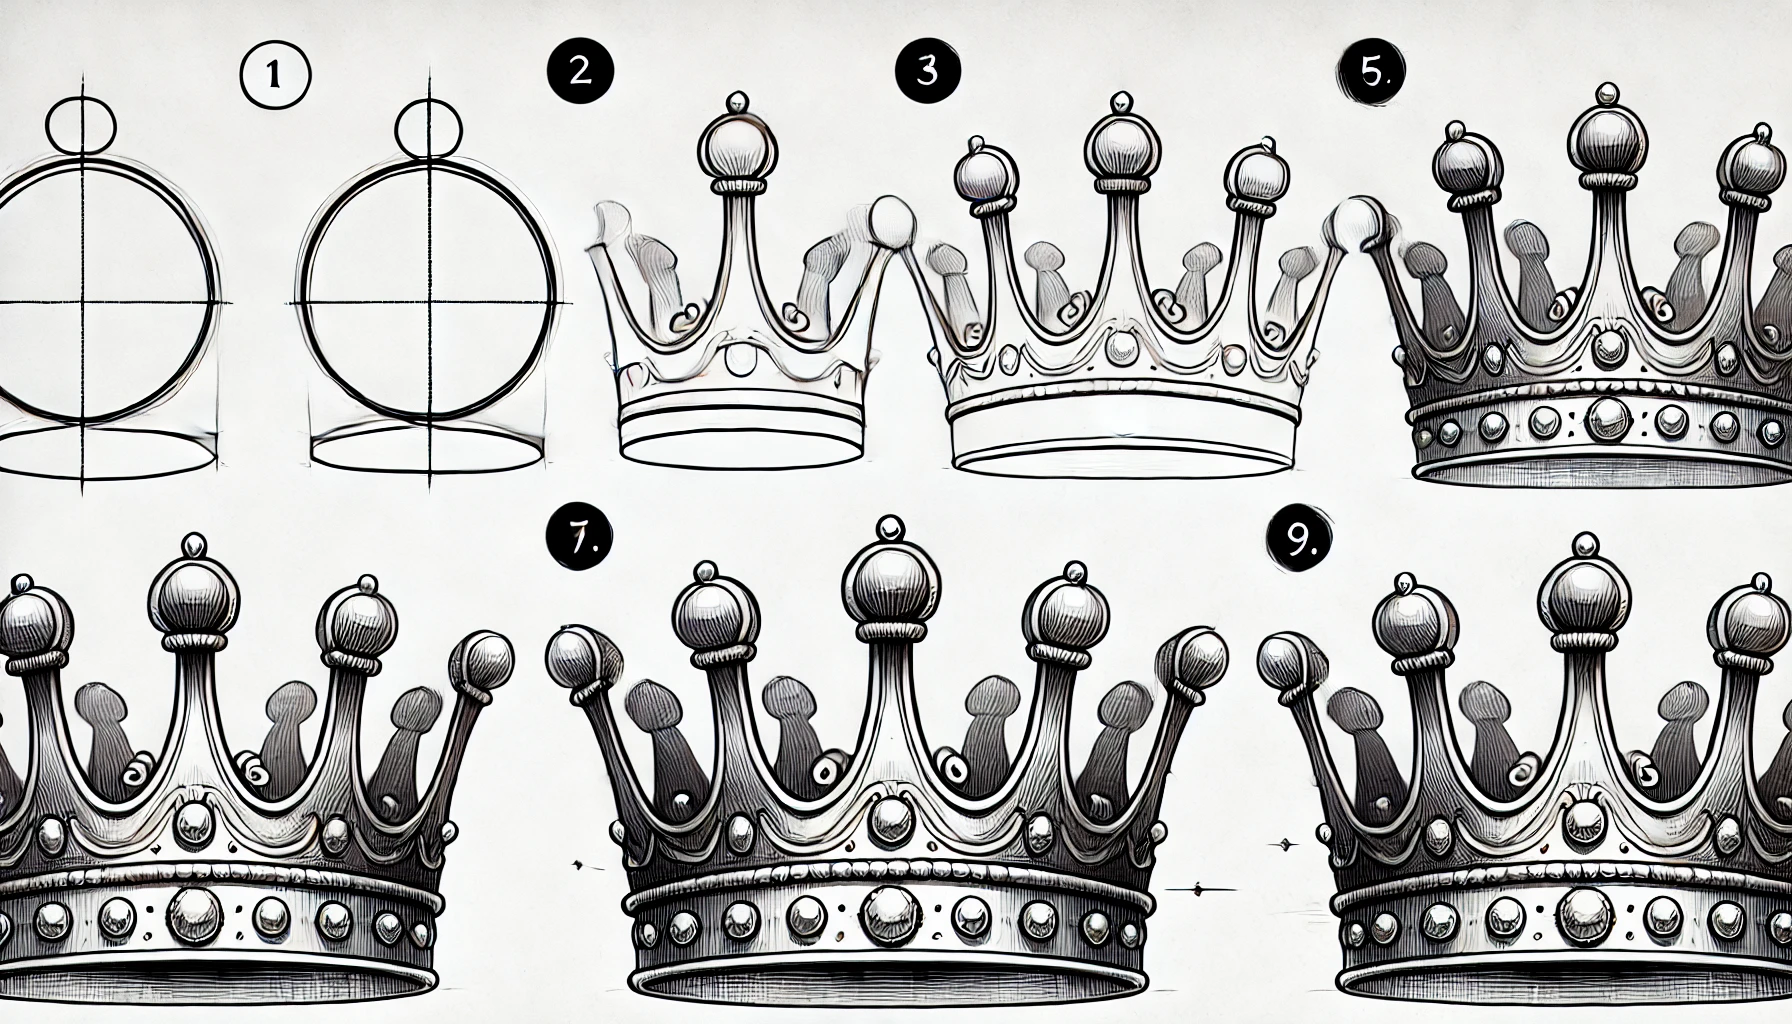
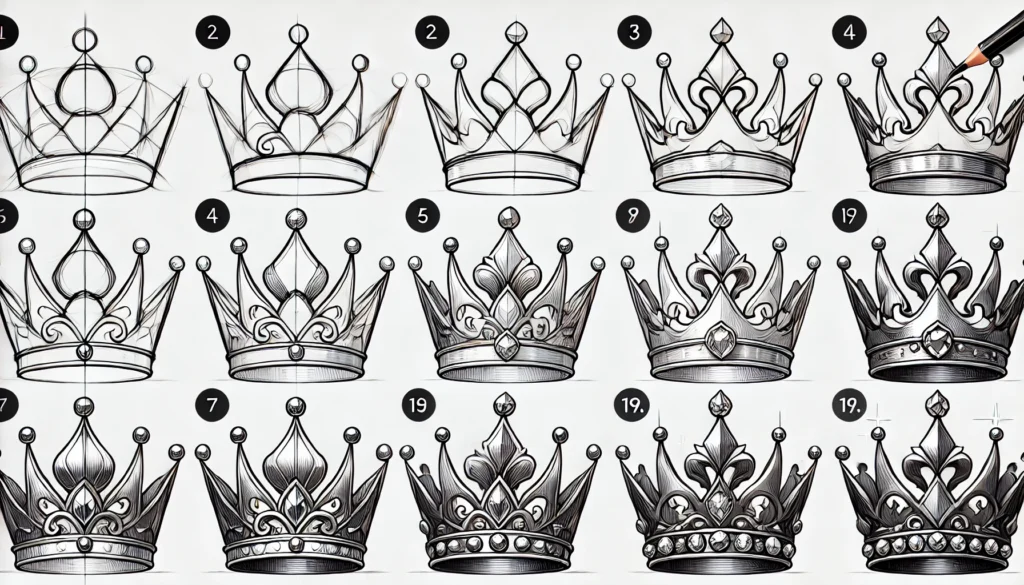
- Basic Shape: Sketch an oval or circular base. This will serve as the foundation for your drawing.
- Types of Crowns: Decide between royal crowns, fantasy tiaras, or historical headdresses. Each type will influence your approach.
Step 3: Sketching the Crown’s Base
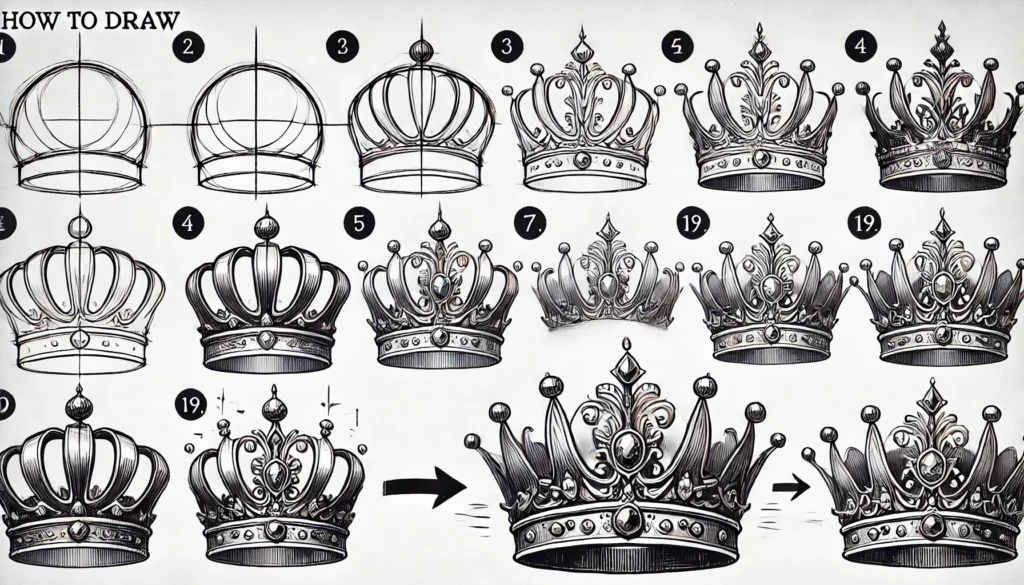
The base of the crown anchors the entire drawing. Start by lightly drawing a curved line to represent the band that wraps around the head. Pay close attention to symmetry, as an imbalanced base can throw off the entire composition.
- Foundation: Draw a basic oval or semi-circle as a guide for the band.
- Symmetry: Use a ruler or lightly sketched guidelines to keep everything even.
Step 4: Adding Details to the Crown
Now, add the defining details. Crowns typically feature upward points, arches, or fleur-de-lis shapes. Lightly draw each point at regular intervals around the band.
- Iconic Points and Arches: Add upward spikes or arches, depending on your chosen crown style.
- Realistic Texture: Consider adding slight curves or flourishes to make the crown look ornate.
Step 5: Adding Gems and Decorative Elements
What’s a crown without its gems? Lightly sketch ovals, circles, or diamond shapes for each gem. Place them symmetrically for balance.
- Drawing Gemstones: Use light, rounded shapes to mimic real jewels.
- Regal Look: Add lines or patterns around each gem to give the impression of intricate settings.
Step 6: Outlining and Refining Your Crown
Once you’re happy with the sketch, go over it with a darker pencil or ink. This will make the design pop and help define the shape.
- Bold Outlines: Trace the primary lines with a steady hand.
- Clean Look: Erase any stray marks for a polished finish.
Step 7: Shading and Adding Depth
To give your crown a realistic touch, add shading. Focus on the base and each point where light might fall.
- Shadows and Highlights: Darken areas that fall under arches or behind gemstones.
- 3D Effect: Add light shading around the crown’s band and points to give a sense of depth.
Final Touches to Complete the Crown
Make your crown unique. Add delicate lines to indicate metal texture or tiny patterns around the gemstones.
- Personalization: Tiny swirls, dots, or lines can add character.
- Final Review: Check for any areas that could use extra refinement.
Common Mistakes and How to Avoid Them
Many beginners struggle with maintaining symmetry and balance. Take your time with each line, and avoid overcrowding the design with excessive details.
- Crooked Symmetry: Use guidelines and work slowly.
- Too Many Details: Less is often more when it comes to creating an elegant crown.
Tips for Perfecting Your Crown Drawing
Patience is key. Use light strokes initially, as heavy lines can be hard to correct. Practice different crown styles for variety.
- Consistency: Regular practice will help refine your technique.
- Light Strokes: This allows for easier adjustments.
Variations on Crown Styles
Crowns come in all shapes and sizes. Experiment with royal crowns, delicate tiaras, or whimsical fantasy designs to keep things interesting.
- Royal Crowns: Typically elaborate and studded with gems.
- Fantasy Crowns: Let your imagination soar, with playful shapes or intricate details.

Adding Color to Your Crown Drawing
Use colored pencils or markers to give your crown vibrance. Choose colors that reflect a royal aesthetic, like gold, silver, or ruby red.
- Effective Use of Color: Layer colors for depth.
- Royal Look: Deep blues, reds, and purples enhance a luxurious feel.
Going Digital: Drawing a Crown on a Tablet
If digital art is your medium, try using software like Procreate or Photoshop. Digital tools allow for intricate detail and easy edits.
- Essential Tools: Experiment with brush settings for texture.
- Shading and Texturing: Layering and blending can create realistic effects.
Inspiring Crown Drawing Ideas
Draw crowns inspired by different cultures, eras, or stories. Create a design that reflects historical influences or fantasy themes.
- Cultural Elements: Incorporate motifs inspired by history.
- Creative Twist: Add unusual details for a unique result.
Practicing with Simple Crowns
Start small. Simple designs help beginners understand proportions and details without getting overwhelmed.
- Beginner Exercises: Try drawing basic circlets or tiaras.
- Quick Sketching: Practice basic forms for confidence.
Advanced Techniques for Crown Drawing
For a challenge, try adding engraving details or intricate patterns. Explore different line weights and textures to achieve a realistic look.
- Intricate Patterns: Use fine lines to add an engraved effect.
- Realism: Mix line weights for a dynamic look.
Tips on Finding Your Artistic Style
Experiment with various styles to discover what feels natural. Play with line weight, texture, and shadow until your unique style emerges.
- Unique Style: Don’t be afraid to break from tradition.
- Experimentation: Test different techniques and tools.
Resources for Improving Your Drawing Skills
Expand your skills with tutorials, online courses, and art communities. Practice and feedback are invaluable for growth.
- Books and Tutorials: Invest in quality resources.
- Community Engagement: Join forums or social media groups for tips.
Conclusion: Celebrating Your Progress
Completing a crown drawing is an achievement. Admire your creation, and appreciate your growth as an artist. Share it with others or keep it as a memento of your progress.
- Embrace Growth: Every drawing brings improvement.
- Showcase Your Work: Frame it or share online as a proud testament to your skills.

