How To Draw A Penguin 5 Easy Steps – Quick and Simple
Posted on |
Introduction to Drawing a Penguin
Why Penguins Make Great Art Subjects
Penguins have a distinct charm that makes them an irresistible choice for artists. With their simple shapes, unique waddling posture, and adorable expressions, they’re a joy to draw, especially for beginners. Penguins are well-loved for their rounded bodies and friendly appearance, which allow for easy, accessible sketches while still offering plenty of room for creativity.
What Makes Drawing Penguins Fun and Easy
Drawing a penguin doesn’t require elaborate techniques or advanced skills. Their shapes are minimalistic, focusing on ovals, circles, and small details that give life to their character. With just a few strokes, you can capture their essence, making penguins ideal for anyone looking to start their drawing journey.
Materials Needed for Drawing a Penguin
Essential Tools for Sketching
A basic pencil is all you need to start. Opt for an HB or 2B pencil for sketching, as these provide a balanced shade that’s easy to erase if needed. An eraser and a sharpener are also essential to keep your lines clean and accurate.
Recommended Papers and Pencils for Beginners
Any sketchbook paper works fine for beginner drawings, though a slightly textured paper can give your drawing more depth. If you’re inclined, try adding a few colored pencils for shading.
Optional Supplies for Extra Detail
For those wanting more detail, fine-tip pens or colored markers add a professional touch to your penguin. You may also consider colored chalk or watercolor pencils to give a vibrant yet soft finish.

Step 1: Drawing the Penguin’s Basic Body Shape
Starting with Simple Shapes: Circles and Ovals
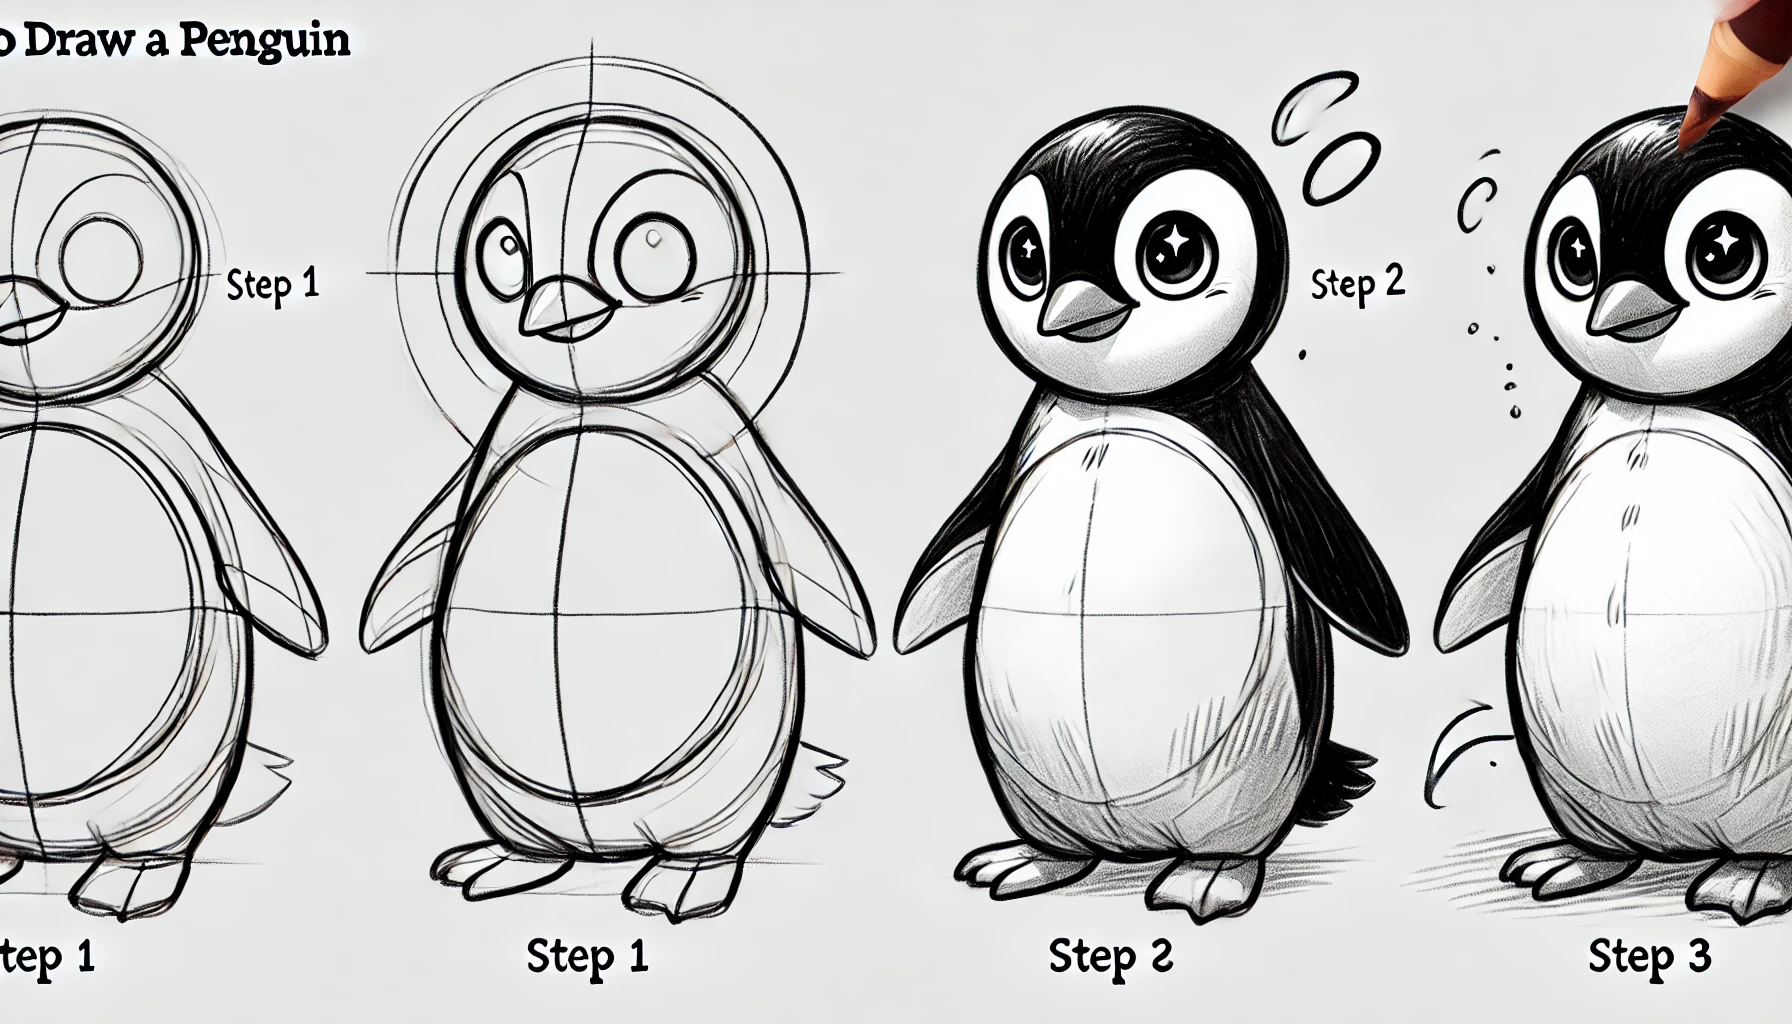
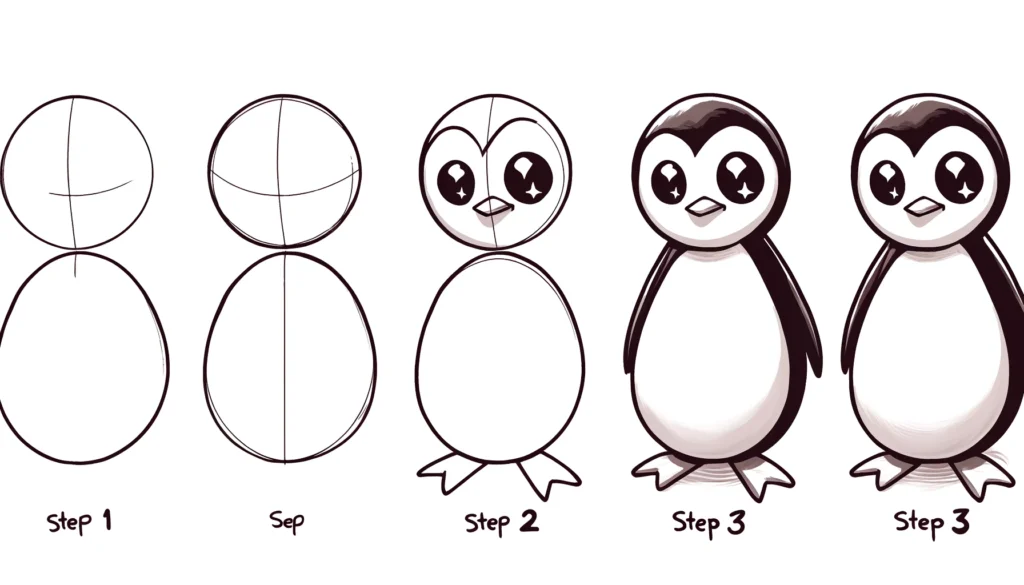
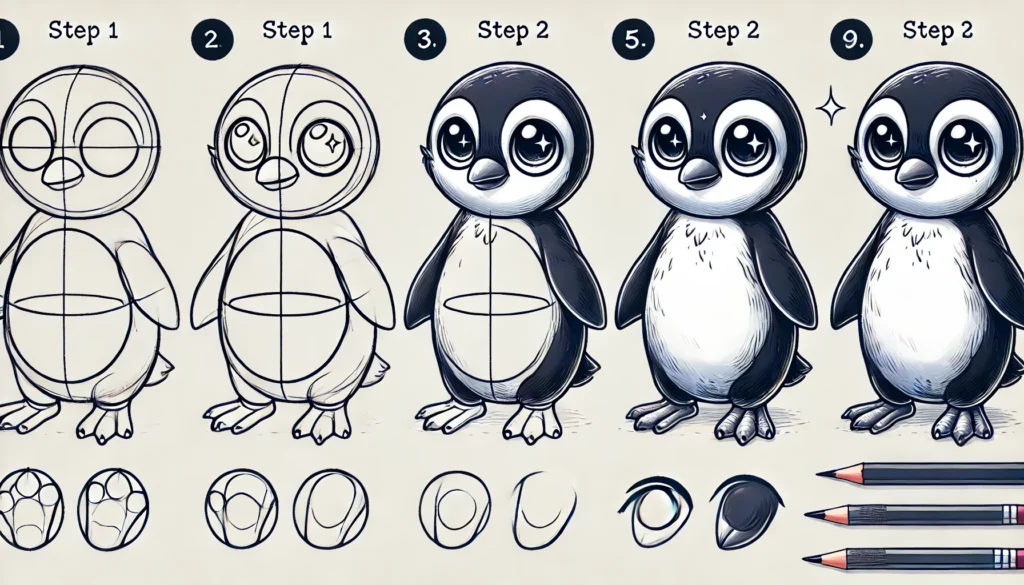
Start by sketching a large oval for the penguin’s body. This foundational shape will serve as the base of your drawing. The simplicity of this shape makes it easy to adjust as you refine the proportions.
Positioning the Body for Balance and Proportion
Ensure the oval is centered and slightly tilted for a more dynamic look. Penguins have rounded shapes, so keeping the form slightly curved will capture their characteristic stance and balance.
Step 2: Sketching the Head and Facial Guidelines
Creating a Proportionate Head Shape
Above the body, sketch a smaller circle to represent the head. Penguins typically have a head size that’s roughly a third of their body, adding to their adorable appearance.
Adding Guideline Markers for Eyes and Beak Placement
Lightly draw a vertical and horizontal line across the head circle. These guidelines will help position the eyes and beak symmetrically, ensuring that the penguin’s face looks balanced and endearing.
Step 3: Drawing the Eyes and Beak
Capturing the Playful Look of Penguin Eyes
Penguin eyes are large and expressive. Draw two small ovals near the upper section of the head. To add life, place a tiny circle inside each oval to capture the glimmer of light reflecting in their eyes.
Shaping the Beak for Expression and Realism
Draw a small triangle or diamond shape just below the eyes for the beak. A slightly curved line adds a friendly, open appearance to the penguin’s face, giving it a lively, curious look.
Step 4: Drawing the Penguin’s Wings and Flippers
Crafting the Signature Penguin Flippers
Penguins are known for their small, flipper-like wings. Sketch two thin, downward-facing ovals on either side of the body. Slightly curve them to suggest movement or a friendly wave.
Adjusting Wing Position for Personality
By varying the wing positions, you can give your penguin personality. Raised wings suggest excitement, while downward wings create a calmer vibe.
Step 5: Shaping the Feet and Adding Details
Creating Simple Feet Shapes
Draw two small, triangular shapes at the bottom of the body for feet. Penguins have webbed feet, so make the edges slightly rounded to capture their natural look.
Adding Webbing and Texture for Realism
Add tiny lines to create webbing between the toes, and lightly shade to give dimension to the feet. This minor detail helps ground your penguin, giving it stability and character.
Adding Final Details for Character and Texture
Texturing the Belly and Body
To add texture, shade the belly with light strokes, giving it a fuzzy look. This subtle touch brings out the softness of the penguin’s down feathers, adding depth.
Adding Feather-Like Details for Depth
With gentle, short strokes, add feathery lines to the edges of the body. This small detail adds realism without overcomplicating the drawing.
Optional: Creating a Background for Your Penguin
Ideas for Fun, Simple Backgrounds
Consider a snowy scene or icy setting to place your penguin in its natural habitat. Soft shapes like snowflakes or simple lines for icebergs can enhance the scene without distracting from the main subject.
Using Light and Shadow to Ground the Penguin
Adding a shadow beneath the feet gives the impression of standing on a solid surface, bringing a realistic element to your drawing.
Tips for Adding Color to Your Penguin Drawing
Choosing the Right Colors for a Classic Penguin Look
For a classic look, use black for the body, white for the belly, and a soft orange for the beak and feet. Keep colors light and layer them gradually.
Techniques for Smooth Color Application
Use circular strokes to apply color smoothly, avoiding harsh lines. This technique creates a more polished, cohesive look.
Common Mistakes and How to Avoid Them
Proportion and Placement Pitfalls
Check the size of each feature regularly to maintain proportion. Use guidelines as a quick way to assess symmetry.
Common Shading and Detailing Errors
Avoid heavy shading; penguins are simple in color and texture. Light shading keeps the drawing clean and realistic.

How to Personalize Your Penguin Drawing
Adding Accessories for a Unique Touch
Consider adding a hat, scarf, or other fun accessories. These small elements give personality to your penguin and can make it truly your own.
Experimenting with Expressions and Styles
Try varying eye shapes, beak positioning, or even a playful blush to add distinct expressions and enhance the penguin’s charm.
Troubleshooting: Adjusting Your Drawing
Fixing Proportion Errors
If a feature looks too large, gently erase and resize it. Correcting proportions is key to a balanced final drawing.
Making Adjustments to Add Symmetry
Step back to view your drawing as a whole; this helps you spot any asymmetry or areas needing adjustment.
Bringing Your Penguin to Life with Shading
Shading Basics for Realistic Depth
Use soft shading around the belly and edges of the head to add three-dimensionality. Focus on the light source to give the right effect.
Techniques for Gradual Shading on a Simple Sketch
Build up layers of shading gradually to avoid harsh lines. This approach is especially helpful around the edges of the wings and flippers.
Ideas for Expanding on Your Penguin Drawing Skills
Trying Different Poses and Perspectives
Draw your penguin from various angles—front, side, or even in motion—to expand your skill set and creativity.
Adding Companions or Environment Elements
Including other penguins or an icy landscape can transform your single drawing into a dynamic scene.
How to Digitize Your Penguin Drawing
Using Digital Tools to Enhance and Share Your Artwork
Scan your drawing to preserve it digitally, or use apps to enhance colors and contrast for a professional finish.
Basic Tips for Scanning and Editing
Ensure good lighting and scan at a high resolution to retain quality. Simple editing tools can brighten or sharpen your drawing.
The Benefits of Learning to Draw Animals
Why Drawing Animals Like Penguins Boosts Creativity
Animal drawings encourage observation and attention to detail, boosting creativity and adaptability in all forms of art.
How Drawing Develops Focus and Patience
Drawing, especially detailed work, enhances concentration and patience, valuable skills in both art and daily life.
Additional Resources for Beginners
Recommended Books and Online Tutorials
Explore beginner-friendly resources like animal drawing books or YouTube tutorials to refine your skills and gather new ideas.
Finding Inspiration in Nature and Wildlife Photography
Nature photography offers authentic inspiration, providing real-life examples of penguin anatomy, posture, and habitats.
Practicing to Perfect Your Penguin Drawing Skills
Building Confidence Through Repetition
Repeat your drawing process to gain confidence. Familiarity with basic shapes leads to improved accuracy and detail.
Analyzing Your Progress Over Time
Keep a collection of your drawings to track your progress. Small improvements become evident, boosting motivation.
Conclusion: Embrace Your Penguin Drawing Journey
Celebrating Your New Skill
Take pride in mastering your penguin drawing! This is a step forward in your artistic journey, opening doors to endless creative possibilities.
Encouragement to Keep Exploring Animal Art
With your penguin complete, consider other animals to draw. Each sketch sharpens your skills, adds variety, and builds a rewarding creative habit.

