1. Introduction to Drawing Fish in Simple Steps Drawing fish offers a delightful foray into the world of art, where flowing lines and organic forms take center stage. Marine life is abundant with fascinating shapes, making fish an ideal starting point for beginners. With easy steps and a gentle learning curve, drawing a fish is both relaxing and engaging. The Joy of Drawing Marine Life The underwater world has always captivated the human imagination, bringing to mind tales of mystery and beauty. Fish, with their graceful movements and vivid colors, embody the essence of the ocean and serve as wonderful subjects for artists, both novice and experienced. Why Fish Are the Perfect Starting Point for Beginners Fish have simple yet striking shapes that lend themselves well to quick sketches or more detailed studies. Their distinct forms, combined with relatively easy anatomy, allow beginners to learn essential drawing techniques without overwhelming detail. 2. Essential Materials for Fish Drawing Gathering the right materials ensures a smooth and enjoyable drawing process, making it easy to jump right in. Basic Drawing Supplies: Paper, Pencils, and Erasers A simple sheet of drawing paper, a soft pencil, and a reliable eraser are the essentials. These basic tools allow for easy adjustments and soft, clean lines. Optional Extras: Color Pencils, Pens, and Shading Tools Adding color pencils, fine-liners, or even blending tools can elevate your artwork, bringing more life and depth to your fish illustration. They are optional but rewarding if you wish to expand your skills. 3. Step 1: Sketching the Fish Outline Starting with the outline helps to establish the fish’s form and posture, laying the groundwork for the details to come. Finding the Fish's Shape Observe a fish’s unique body shape – usually streamlined and oval. This basic shape forms the skeleton of your drawing. Starting with a Light Pencil Stroke Using light strokes, begin sketching the oval shape, marking where the head, fins, and tail will go. Keep it soft, as this is just the foundation. 4. Step 2: Adding Details to the Fish Body The body is the core of the fish, and refining its shape adds realism. Refining the Fish's Basic Shape Gradually narrow the ends of the oval to form the head and tail. This gives a more natural look, resembling a fish’s streamlined body. Creating Depth with Fins and Tail Add the fins along the sides and a tail at the end. Fins should appear fluid, with curved lines to capture their motion and delicacy. 5. Step 3: Drawing the Fish’s Head and Mouth Adding the head and mouth brings personality to your fish drawing. Shaping the Head Outline the head at one end of the body, making it slightly rounded. This section should feel distinct yet seamlessly connected to the body. Defining the Mouth for Expression Draw a small, subtle line or curve for the mouth. Fish mouths vary, so this line can express different emotions or features depending on the type of fish. 6. Step 4: Detailing the Fish’s Eyes The eyes give life to the fish, serving as a focal point in your drawing. Positioning the Eye Correctly Place the eye about midway up the head. Keeping the eye proportional helps with realism. Adding Life to the Fish with Highlights To make the eye pop, add a tiny highlight. This small touch of light brings an expressive quality that draws the viewer’s attention. 7. Step 5: Enhancing the Fins and Tail Fins and tails add fluidity, completing the fish’s dynamic look. Different Types of Fish Tails and Their Shapes Fish tails can be forked, round, or even pointed. Experimenting with various shapes can add uniqueness to your drawing. Giving Movement and Flow to the Fins Draw fins with slight curves to capture the impression of movement, allowing your fish to look like it’s swimming through water. 8. Final Touches and Refinement Finalizing the drawing is about enhancing lines and preparing for any further detailing. Erasing Unnecessary Lines Remove any stray or extra lines used for outlining to clean up the drawing and make it look polished. Enhancing Key Details for Realism Strengthen the lines around the fins, eyes, and mouth for a sharper, more vivid look. 9. Adding Texture to the Fish Texture is vital to convey the scaly skin of the fish. Creating Scales with Simple Techniques Use tiny, overlapping half-circles to create scales, focusing on even spacing for a natural appearance. Using Cross-Hatching for a Realistic Effect For shading, cross-hatching can mimic the shadows cast by scales, enhancing the fish’s three-dimensional form. 10. Adding Shadows and Shading Proper shading defines volume and realism. Placement of Light and Shadow Decide on a light source and darken areas accordingly. Shadows will accentuate the fish’s curves and contours. Techniques for Smooth Shading Blending tools or gentle pencil strokes can soften the shading, giving the fish a sleek, smooth look. 11. Coloring the Fish Color brings your drawing to life, adding vibrancy and energy. Selecting Vibrant or Natural Colors Choose a color scheme based on real-life fish or unleash your imagination with bold, unexpected hues. Blending and Layering for Depth Layer colors to create gradient effects, giving a lifelike quality that mimics a fish’s iridescent skin. 12. Tips for Experimenting with Fish Styles Playing with styles keeps the process fun and allows you to explore different artistic approaches. From Realistic to Cartoonish Fish Whether aiming for photorealism or a whimsical cartoon style, each approach requires distinct techniques. Adapting Techniques to Various Fish Species Each fish species has unique characteristics; adapting your drawing methods lets you diversify your portfolio. 13. Common Mistakes to Avoid in Fish Drawing Avoiding common errors will streamline your artistic progress. Overcrowding Details While detail is good, too much can overwhelm. Focus on essentials to maintain clarity. Losing Proportion in the Fish Body Stay mindful of the fish’s overall form to keep it proportionate and believable. 20. Conclusion and Encouragement for Future Drawings Embrace the joys of sketching sea life, knowing each stroke hones your skill. With every fish drawn, you’ll feel the confidence to tackle more complex aquatic forms, expanding your artistic horizons under the vast inspiration of the ocean.

How To Draw A Fish 5 Easy Steps – Quick and Simple

Posted on |

1. Introduction How To Draw A Fish

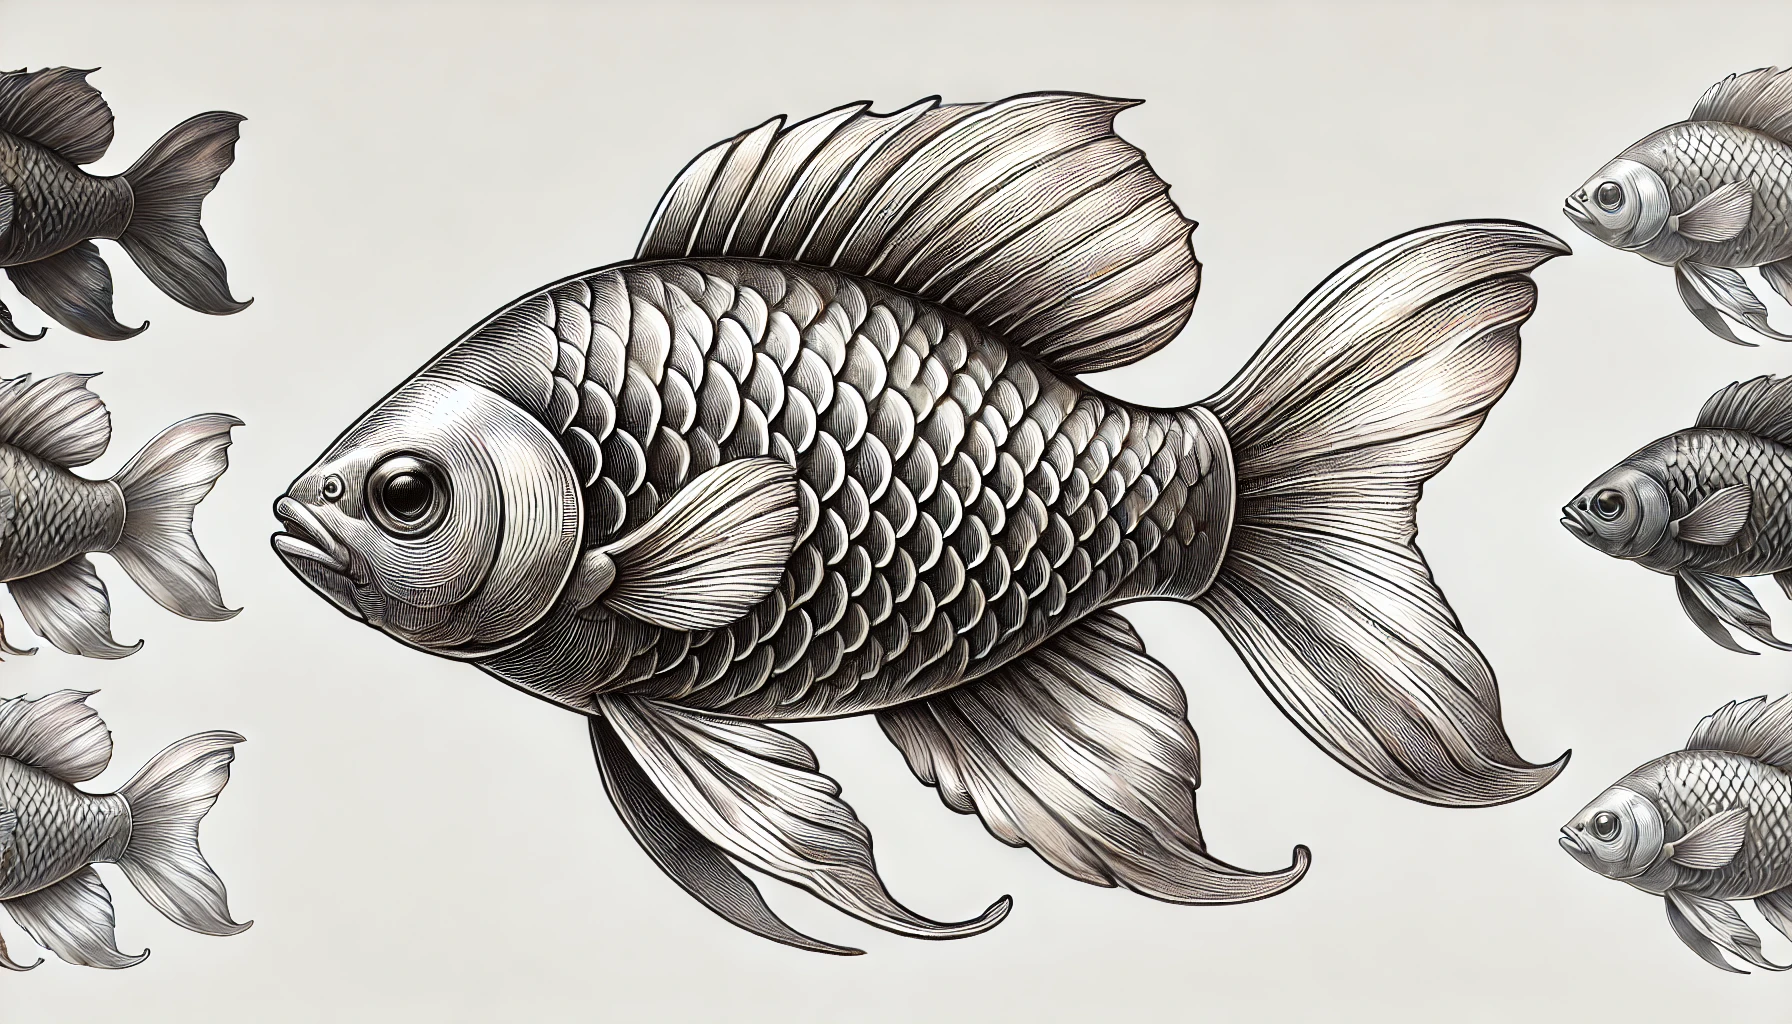
Drawing fish offers a delightful foray into the world of art, where flowing lines and organic forms take center stage. Marine life is abundant with fascinating shapes, making fish an ideal starting point for beginners. With easy steps and a gentle learning curve, drawing a fish is both relaxing and engaging.

The Joy of Drawing Marine Life

The underwater world has always captivated the human imagination, bringing to mind tales of mystery and beauty. Fish, with their graceful movements and vivid colors, embody the essence of the ocean and serve as wonderful subjects for artists, both novice and experienced.

Why Fish Are the Perfect Starting Point for Beginners

Fish have simple yet striking shapes that lend themselves well to quick sketches or more detailed studies. Their distinct forms, combined with relatively easy anatomy, allow beginners to learn essential drawing techniques without overwhelming detail.


2. Essential Materials for Fish Drawing

Gathering the right materials ensures a smooth and enjoyable drawing process, making it easy to jump right in.

Basic Drawing Supplies: Paper, Pencils, and Erasers

A simple sheet of drawing paper, a soft pencil, and a reliable eraser are the essentials. These basic tools allow for easy adjustments and soft, clean lines.

Optional Extras: Color Pencils, Pens, and Shading Tools

Adding color pencils, fine-liners, or even blending tools can elevate your artwork, bringing more life and depth to your fish illustration. They are optional but rewarding if you wish to expand your skills.

1. Introduction to Drawing Fish in Simple Steps
Drawing fish offers a delightful foray into the world of art, where flowing lines and organic forms take center stage. Marine life is abundant with fascinating shapes, making fish an ideal starting point for beginners. With easy steps and a gentle learning curve, drawing a fish is both relaxing and engaging.

The Joy of Drawing Marine Life
The underwater world has always captivated the human imagination, bringing to mind tales of mystery and beauty. Fish, with their graceful movements and vivid colors, embody the essence of the ocean and serve as wonderful subjects for artists, both novice and experienced.

Why Fish Are the Perfect Starting Point for Beginners
Fish have simple yet striking shapes that lend themselves well to quick sketches or more detailed studies. Their distinct forms, combined with relatively easy anatomy, allow beginners to learn essential drawing techniques without overwhelming detail.

2. Essential Materials for Fish Drawing
Gathering the right materials ensures a smooth and enjoyable drawing process, making it easy to jump right in.

Basic Drawing Supplies: Paper, Pencils, and Erasers
A simple sheet of drawing paper, a soft pencil, and a reliable eraser are the essentials. These basic tools allow for easy adjustments and soft, clean lines.

Optional Extras: Color Pencils, Pens, and Shading Tools
Adding color pencils, fine-liners, or even blending tools can elevate your artwork, bringing more life and depth to your fish illustration. They are optional but rewarding if you wish to expand your skills.

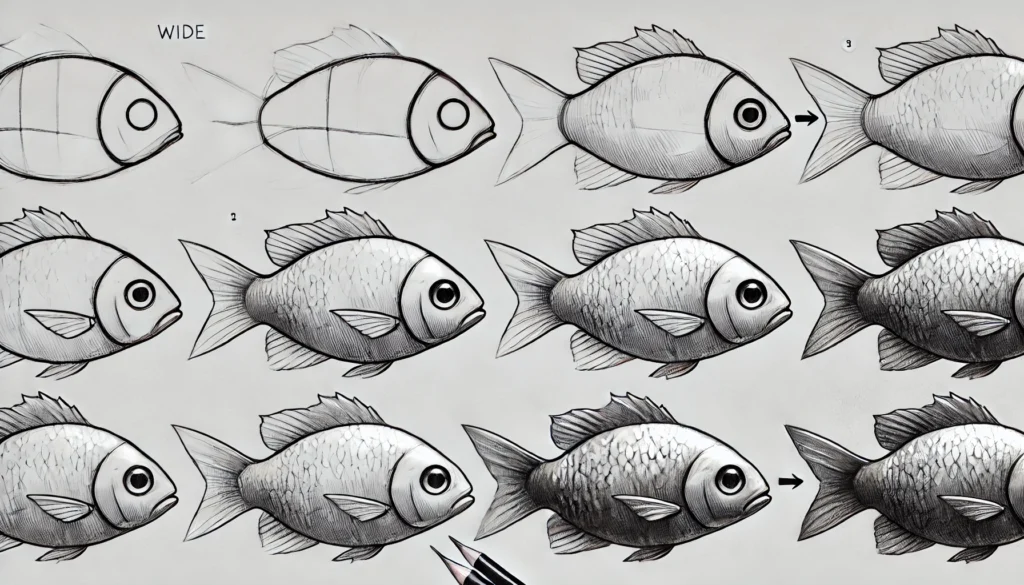
3. Step 1: Sketching the Fish Outline
Starting with the outline helps to establish the fish’s form and posture, laying the groundwork for the details to come.

Finding the Fish's Shape
Observe a fish’s unique body shape – usually streamlined and oval. This basic shape forms the skeleton of your drawing.

Starting with a Light Pencil Stroke
Using light strokes, begin sketching the oval shape, marking where the head, fins, and tail will go. Keep it soft, as this is just the foundation.

4. Step 2: Adding Details to the Fish Body
The body is the core of the fish, and refining its shape adds realism.

Refining the Fish's Basic Shape
Gradually narrow the ends of the oval to form the head and tail. This gives a more natural look, resembling a fish’s streamlined body.

Creating Depth with Fins and Tail
Add the fins along the sides and a tail at the end. Fins should appear fluid, with curved lines to capture their motion and delicacy.

5. Step 3: Drawing the Fish’s Head and Mouth
Adding the head and mouth brings personality to your fish drawing.

Shaping the Head
Outline the head at one end of the body, making it slightly rounded. This section should feel distinct yet seamlessly connected to the body.

Defining the Mouth for Expression
Draw a small, subtle line or curve for the mouth. Fish mouths vary, so this line can express different emotions or features depending on the type of fish.

6. Step 4: Detailing the Fish’s Eyes
The eyes give life to the fish, serving as a focal point in your drawing.

Positioning the Eye Correctly
Place the eye about midway up the head. Keeping the eye proportional helps with realism.

Adding Life to the Fish with Highlights
To make the eye pop, add a tiny highlight. This small touch of light brings an expressive quality that draws the viewer’s attention.

7. Step 5: Enhancing the Fins and Tail
Fins and tails add fluidity, completing the fish’s dynamic look.

Different Types of Fish Tails and Their Shapes
Fish tails can be forked, round, or even pointed. Experimenting with various shapes can add uniqueness to your drawing.

Giving Movement and Flow to the Fins
Draw fins with slight curves to capture the impression of movement, allowing your fish to look like it’s swimming through water.

8. Final Touches and Refinement
Finalizing the drawing is about enhancing lines and preparing for any further detailing.

Erasing Unnecessary Lines
Remove any stray or extra lines used for outlining to clean up the drawing and make it look polished.

Enhancing Key Details for Realism
Strengthen the lines around the fins, eyes, and mouth for a sharper, more vivid look.

9. Adding Texture to the Fish
Texture is vital to convey the scaly skin of the fish.

Creating Scales with Simple Techniques
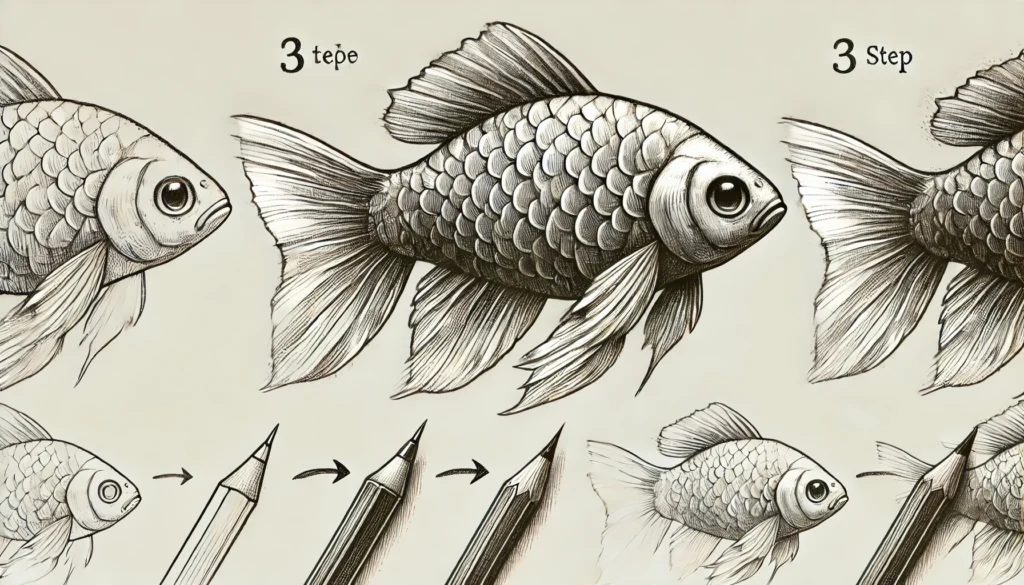
Use tiny, overlapping half-circles to create scales, focusing on even spacing for a natural appearance.

Using Cross-Hatching for a Realistic Effect
For shading, cross-hatching can mimic the shadows cast by scales, enhancing the fish’s three-dimensional form.

10. Adding Shadows and Shading
Proper shading defines volume and realism.

Placement of Light and Shadow
Decide on a light source and darken areas accordingly. Shadows will accentuate the fish’s curves and contours.

Techniques for Smooth Shading
Blending tools or gentle pencil strokes can soften the shading, giving the fish a sleek, smooth look.
11. Coloring the Fish
Color brings your drawing to life, adding vibrancy and energy.

Selecting Vibrant or Natural Colors
Choose a color scheme based on real-life fish or unleash your imagination with bold, unexpected hues.

Blending and Layering for Depth
Layer colors to create gradient effects, giving a lifelike quality that mimics a fish’s iridescent skin.

12. Tips for Experimenting with Fish Styles
Playing with styles keeps the process fun and allows you to explore different artistic approaches.

From Realistic to Cartoonish Fish
Whether aiming for photorealism or a whimsical cartoon style, each approach requires distinct techniques.

Adapting Techniques to Various Fish Species
Each fish species has unique characteristics; adapting your drawing methods lets you diversify your portfolio.

13. Common Mistakes to Avoid in Fish Drawing
Avoiding common errors will streamline your artistic progress.

Overcrowding Details
While detail is good, too much can overwhelm. Focus on essentials to maintain clarity.

Losing Proportion in the Fish Body
Stay mindful of the fish’s overall form to keep it proportionate and believable.

20. Conclusion and Encouragement for Future Drawings
Embrace the joys of sketching sea life, knowing each stroke hones your skill. With every fish drawn, you’ll feel the confidence to tackle more complex aquatic forms, expanding your artistic horizons under the vast inspiration of the ocean.
How To Draw A Fish 5 Easy Steps – Quick and Simple 4

3. Step 1: Sketching the Fish Outline

Starting with the outline helps to establish the fish’s form and posture, laying the groundwork for the details to come.

Finding the Fish’s Shape

Observe a fish’s unique body shape – usually streamlined and oval. This basic shape forms the skeleton of your drawing.

Starting with a Light Pencil Stroke

Using light strokes, begin sketching the oval shape, marking where the head, fins, and tail will go. Keep it soft, as this is just the foundation.


4. Step 2: Adding Details to the Fish Body

The body is the core of the fish, and refining its shape adds realism.

Refining the Fish’s Basic Shape

Gradually narrow the ends of the oval to form the head and tail. This gives a more natural look, resembling a fish’s streamlined body.

Creating Depth with Fins and Tail

Add the fins along the sides and a tail at the end. Fins should appear fluid, with curved lines to capture their motion and delicacy.


5. Step 3: Drawing the Fish’s Head and Mouth

Adding the head and mouth brings personality to your fish drawing.

Shaping the Head

Outline the head at one end of the body, making it slightly rounded. This section should feel distinct yet seamlessly connected to the body.

Defining the Mouth for Expression

Draw a small, subtle line or curve for the mouth. Fish mouths vary, so this line can express different emotions or features depending on the type of fish.


6. Step 4: Detailing the Fish’s Eyes

The eyes give life to the fish, serving as a focal point in your drawing.

Positioning the Eye Correctly

Place the eye about midway up the head. Keeping the eye proportional helps with realism.

Adding Life to the Fish with Highlights

To make the eye pop, add a tiny highlight. This small touch of light brings an expressive quality that draws the viewer’s attention.


7. Step 5: Enhancing the Fins and Tail

Fins and tails add fluidity, completing the fish’s dynamic look.

Different Types of Fish Tails and Their Shapes

Fish tails can be forked, round, or even pointed. Experimenting with various shapes can add uniqueness to your drawing.

Giving Movement and Flow to the Fins

Draw fins with slight curves to capture the impression of movement, allowing your fish to look like it’s swimming through water.


8. Final Touches and Refinement

Finalizing the drawing is about enhancing lines and preparing for any further detailing.

Erasing Unnecessary Lines

Remove any stray or extra lines used for outlining to clean up the drawing and make it look polished.

Enhancing Key Details for Realism

Strengthen the lines around the fins, eyes, and mouth for a sharper, more vivid look.


9. Adding Texture to the Fish

Texture is vital to convey the scaly skin of the fish.

Creating Scales with Simple Techniques

Use tiny, overlapping half-circles to create scales, focusing on even spacing for a natural appearance.

Using Cross-Hatching for a Realistic Effect

For shading, cross-hatching can mimic the shadows cast by scales, enhancing the fish’s three-dimensional form.


10. Adding Shadows and Shading

Proper shading defines volume and realism.

Placement of Light and Shadow

Decide on a light source and darken areas accordingly. Shadows will accentuate the fish’s curves and contours.

Techniques for Smooth Shading

Blending tools or gentle pencil strokes can soften the shading, giving the fish a sleek, smooth look.

1. Introduction to Drawing Fish in Simple Steps
Drawing fish offers a delightful foray into the world of art, where flowing lines and organic forms take center stage. Marine life is abundant with fascinating shapes, making fish an ideal starting point for beginners. With easy steps and a gentle learning curve, drawing a fish is both relaxing and engaging.

The Joy of Drawing Marine Life
The underwater world has always captivated the human imagination, bringing to mind tales of mystery and beauty. Fish, with their graceful movements and vivid colors, embody the essence of the ocean and serve as wonderful subjects for artists, both novice and experienced.

Why Fish Are the Perfect Starting Point for Beginners
Fish have simple yet striking shapes that lend themselves well to quick sketches or more detailed studies. Their distinct forms, combined with relatively easy anatomy, allow beginners to learn essential drawing techniques without overwhelming detail.

2. Essential Materials for Fish Drawing
Gathering the right materials ensures a smooth and enjoyable drawing process, making it easy to jump right in.

Basic Drawing Supplies: Paper, Pencils, and Erasers
A simple sheet of drawing paper, a soft pencil, and a reliable eraser are the essentials. These basic tools allow for easy adjustments and soft, clean lines.

Optional Extras: Color Pencils, Pens, and Shading Tools
Adding color pencils, fine-liners, or even blending tools can elevate your artwork, bringing more life and depth to your fish illustration. They are optional but rewarding if you wish to expand your skills.

3. Step 1: Sketching the Fish Outline
Starting with the outline helps to establish the fish’s form and posture, laying the groundwork for the details to come.

Finding the Fish's Shape
Observe a fish’s unique body shape – usually streamlined and oval. This basic shape forms the skeleton of your drawing.

Starting with a Light Pencil Stroke
Using light strokes, begin sketching the oval shape, marking where the head, fins, and tail will go. Keep it soft, as this is just the foundation.

4. Step 2: Adding Details to the Fish Body
The body is the core of the fish, and refining its shape adds realism.

Refining the Fish's Basic Shape
Gradually narrow the ends of the oval to form the head and tail. This gives a more natural look, resembling a fish’s streamlined body.

Creating Depth with Fins and Tail
Add the fins along the sides and a tail at the end. Fins should appear fluid, with curved lines to capture their motion and delicacy.

5. Step 3: Drawing the Fish’s Head and Mouth
Adding the head and mouth brings personality to your fish drawing.

Shaping the Head
Outline the head at one end of the body, making it slightly rounded. This section should feel distinct yet seamlessly connected to the body.

Defining the Mouth for Expression
Draw a small, subtle line or curve for the mouth. Fish mouths vary, so this line can express different emotions or features depending on the type of fish.

6. Step 4: Detailing the Fish’s Eyes
The eyes give life to the fish, serving as a focal point in your drawing.

Positioning the Eye Correctly
Place the eye about midway up the head. Keeping the eye proportional helps with realism.

Adding Life to the Fish with Highlights
To make the eye pop, add a tiny highlight. This small touch of light brings an expressive quality that draws the viewer’s attention.

7. Step 5: Enhancing the Fins and Tail
Fins and tails add fluidity, completing the fish’s dynamic look.

Different Types of Fish Tails and Their Shapes
Fish tails can be forked, round, or even pointed. Experimenting with various shapes can add uniqueness to your drawing.

Giving Movement and Flow to the Fins
Draw fins with slight curves to capture the impression of movement, allowing your fish to look like it’s swimming through water.

8. Final Touches and Refinement
Finalizing the drawing is about enhancing lines and preparing for any further detailing.

Erasing Unnecessary Lines
Remove any stray or extra lines used for outlining to clean up the drawing and make it look polished.

Enhancing Key Details for Realism
Strengthen the lines around the fins, eyes, and mouth for a sharper, more vivid look.

9. Adding Texture to the Fish
Texture is vital to convey the scaly skin of the fish.

Creating Scales with Simple Techniques
Use tiny, overlapping half-circles to create scales, focusing on even spacing for a natural appearance.

Using Cross-Hatching for a Realistic Effect
For shading, cross-hatching can mimic the shadows cast by scales, enhancing the fish’s three-dimensional form.

10. Adding Shadows and Shading
Proper shading defines volume and realism.

Placement of Light and Shadow
Decide on a light source and darken areas accordingly. Shadows will accentuate the fish’s curves and contours.

Techniques for Smooth Shading
Blending tools or gentle pencil strokes can soften the shading, giving the fish a sleek, smooth look.

11. Coloring the Fish
Color brings your drawing to life, adding vibrancy and energy.

Selecting Vibrant or Natural Colors
Choose a color scheme based on real-life fish or unleash your imagination with bold, unexpected hues.

Blending and Layering for Depth
Layer colors to create gradient effects, giving a lifelike quality that mimics a fish’s iridescent skin.

12. Tips for Experimenting with Fish Styles
Playing with styles keeps the process fun and allows you to explore different artistic approaches.

From Realistic to Cartoonish Fish
Whether aiming for photorealism or a whimsical cartoon style, each approach requires distinct techniques.

Adapting Techniques to Various Fish Species
Each fish species has unique characteristics; adapting your drawing methods lets you diversify your portfolio.

13. Common Mistakes to Avoid in Fish Drawing
Avoiding common errors will streamline your artistic progress.

Overcrowding Details
While detail is good, too much can overwhelm. Focus on essentials to maintain clarity.

Losing Proportion in the Fish Body
Stay mindful of the fish’s overall form to keep it proportionate and believable.

20. Conclusion and Encouragement for Future Drawings
Embrace the joys of sketching sea life, knowing each stroke hones your skill. With every fish drawn, you’ll feel the confidence to tackle more complex aquatic forms, expanding your artistic horizons under the vast inspiration of the ocean.
How To Draw A Fish 5 Easy Steps – Quick and Simple 5

11. Coloring the Fish

Color brings your drawing to life, adding vibrancy and energy.

Selecting Vibrant or Natural Colors

Choose a color scheme based on real-life fish or unleash your imagination with bold, unexpected hues.

Blending and Layering for Depth

Layer colors to create gradient effects, giving a lifelike quality that mimics a fish’s iridescent skin.


12. Tips for Experimenting with Fish Styles

Playing with styles keeps the process fun and allows you to explore different artistic approaches.

From Realistic to Cartoonish Fish

Whether aiming for photorealism or a whimsical cartoon style, each approach requires distinct techniques.

Adapting Techniques to Various Fish Species

Each fish species has unique characteristics; adapting your drawing methods lets you diversify your portfolio.


13. Common Mistakes to Avoid in Fish Drawing

Avoiding common errors will streamline your artistic progress.

Overcrowding Details

While detail is good, too much can overwhelm. Focus on essentials to maintain clarity.

Losing Proportion in the Fish Body

Stay mindful of the fish’s overall form to keep it proportionate and believable.


20. Conclusion and Encouragement for Future Drawings

Embrace the joys of sketching sea life, knowing each stroke hones your skill. With every fish drawn, you’ll feel the confidence to tackle more complex aquatic forms, expanding your artistic horizons under the vast inspiration of the ocean.